WELCOME

for any suggestion's please mail to this id:

nanduriraja537@gmail.com,raja.mic539@gmail.com

Thursday, July 28, 2011

You see the same ol’ stuff on Facebook

You see the same ol’ stuff on Facebook all the time that make you cringe — low-resolution webcam photos, or a photo of you taken by yourself with a camera reflecting in the mirror. I’m not pointing fingers, but as Drake said recently: I’m just saying you could do better.

Here are three easy, free, and fantastic services that you can use to enhance your photos, profile pictures, display pictures, and even landscape photos. Check them out!

ImageOid

If you need quick adjustments like embossing or adding a border (as seen in image below), or quick color effects such as grayscale or sepia, or even slightly more complex such as reflections and adding noise, ImageOid is a great free and fast tool that you can use to touch up photos.

ImageOid User Interface

In the top section (1) of the screenshot, there is the selection of various effects. There 32 effects at the time of writing, a lot of which are color modifications and simple effects, such as blur and emboss. Some of these effects are actually part of Adobe Photoshop, and while not as adjustable, they certainly are a great free option to turn towards.

In the right section (2) of the screenshot, you can undo and redo effects that you choose to apply to your photograph, similar to Photoshop’s History tool.

The beauty of ImageOid lies in the details. For example, it just takes a second to make changes and undo them — it’s really quite a speedy process. Additionally, it remembers the image you last loaded in the browsing session, and will do so until you change the image or reset ImageOid.

If you’re looking to make some quick tweaks to your photographs, check out ImageOid!

VintageJS

Lately, the vintage-style photograph has made a comeback. VintageJS tweaks your photographs by adding a faded, vintage look to them.

VintageJS

Highlighted are the eight options you can choose to modify. I’m pretty pleased with the final result, although I’d prefer to have the option that can control how many black spots the screenlayer puts over your photo. Nonetheless, you can judge for yourself the final result and experiment with it on your own photographs.

Try VintageJS out now!

TiltShift

Now, I’m no professional photographer — in fact, I’m not even a hobbyist. While I love those cool lenses that allow you to blur large areas and create all these cool focusing effects, I’d prefer to spend my money elsewhere. If you’re anything like me, I’ve got just the right tool for you to keep you satisfied with your pictures’ effects while not burning a hole through your pocket.

TiltShift Linear

With TiltShift, you can adjust various characteristics of the picture, as illustrated in the screenshot above. The key here is that you can create a linear blur (as seen above), or also a radial blur (as seen below).

TiltShift Radial

Some effects also include different lighting properties, as well as moving where you want the blur center point to be. It’s a really useful tool — in this case, especially for landscapes. Unfortunately, my lack of photography equipment has led me to also have a severe lack of cool photographs to use in these kinds of demonstrations.

Try TiltShift right now!

All these services are free and available online, which means you can take a quick five minutes out of your day to quickly check them out and play around.

If you are thirsty for more photography webapps, check out Dermandar, which allows you to create panoramic photos.

In one of our previous articles,

In one of our previous articles, we demonstrated how a user can backup all his data from Facebook on his local computer. We used Mozilla Firefox with ArchiveFB plugin installed on it to do the trick. The only setback was that the above trick worked with Facebook alone and did not provide any solution if you wanted to backup your data from other services, for example, Google.

On 28th June, Google unveiled its new service named Google Takeout to address the above problem. Google Takeout is a free service by Google that allows you to download a copy of your data stored within Google products on your local computer, in form of an archive. Takeout is the first product from Google’s Data Liberation Front team, an engineering group tasked with the goal of making it – in their own words – easier for users to move their data in and out of Google products.

How to Use Google Takeout

Step 1: Visit Google Takeout homepage and sign in to your Google account.

Step 2: Before you can backup any data, you need to select the services you want to perform the task on.

Google takeout services

Either you can select all the services at once, or you can select services one by one according to your priorities.

google takeout select services

Step 3: Once you have selected all the data you want to backup, click the big red button create archive at the end of the page.

Step 4: The backup process will start with the creation of an archive file for all your data. Creation of archive may take few seconds to some minutes, depending on the size of the backup. It might be enough time to go and grab a cup of coffee.

Step 5: Once the backup is ready, go to the download tab and click the download button. You will be asked to re-authenticate your Google account. Once the authentication is successful your download will start automatically.

google takeout download

Note: Usage of any download accelerator to download the backup may cause problems. Please use default browser download to save the backup .

After the download is successful, open the archive. You will be amazed to see data organized in folders making it a treat for users.

Googel Takeout Archive Backup

Pros and Cons

All the data downloaded in the archive are in portable and open format and thus exporting the data to other services is a very easy task.

However, the service does not provide any scope to download data from Gmail yet.

My Verdict

Google Takeout is an awesome service to get a backup of all the valuable data from Google servers. The service did not get the limelight it deserved because of parallel launch of Google Plus but definitely has potential, and should be considered for use by all Google users.

Google Takeout

Wednesday, July 27, 2011

encryption

is serious business and it’s not only for spies and spooks. Everyday users need the cloak of privacy too. Public-key cryptography is just too perplexing for most of us; what’s needed is a simpler no-hassle, no-brainer way of sending emails for ‘your eyes only’. There are a few security minded online apps which are dumbing down the whole process of sending encrypted emails. Let’s check out two of those.

works with the same encryption algorithm that the NSA (National Security Agency) in the United States uses to secure their top-secret files. The 256-bit SSL encryption code is one of the strongest available and cannot be hacked by brute force attacks.

If you are getting put off by the technical gobbledygook, don’t worry because Sendinc does the heavy lifting. All you have to do is sign up and compose your message with attachments if any. The rest of the process follows as such:

Sendinc

1. Sendinc encrypts the message with a unique one time encryption key.

2. The encryption key is sent to the recipients as a link. Only the recipient has the key because Sendinc deletes the key from its servers.

3. The recipients can retrieve the message by following the link in the email and logging into their Sendinc account (or by creating an account). The message is decoded securely using 256-bit SSL.

Sendinc

Sendinc’s use of Amazon’s highly durable S3 storage infrastructure to host the encrypted message might help to bolster your confidence in the whole process.


Lockbin

also uses the same encryption algorithm – AES-256 bit encryption. The difference in approach is that with Lockbin you create a personal password and send it to the recipient using a phone, text message, instant message or homing pigeon, but advisedly not email. The other obvious difference is that you do not need to register and log-in. your email. Without the log-in, the process is slightly simpler:

1. Compose your email message by filling in the details.

2. Create your password or secret key and submit the email.

Lockbin-encryption

3. The recipient receives a link to pick up the message from Lockbin’s server.

Lockbin-encryption

4. The secret word unlocks the message. The recipient can reply to the message with an encrypted email. Once read, the message can be deleted from the server.

Quite handily, Lockbin also has a free cross-platform desktop app. It’s worth a download if your send encrypted emails quite regularly.

Encrypted emails are very useful if you want to send sensitive information like financial details. It boils down to the degree of trust. Ever tried sending an encrypted email?

Your email account is definitely an important asset

Your email account is definitely an important asset in this information age, and you really can’t afford to loose the data associated with it. While most of the mail providers ensure that your email is backed up and safe nothing is for certain. Hence backing them up offline on your computer is recommended. Today, we will take a look at a cool software called MailStore Home, that can backup all your email accounts, be it Gmail , to your PC.

What is MailStore Home

MailStore Home is a freeware that creates an archive of all your mail on your computer from different programs, mailboxes and webmail services. The application is lightweight and supports any POP3 and IMAP mailbox along with popular desktop email clients.

Creating backup

Step 1: Download and install your computer where you want to create your centralized backup. You can even use of the program.

Step 2: Once you fire up MailStore after its successful installation, select Archive Email from the home screen.

Archive Email

Step 3: You now need specify the service you wish to create the archive for. I have used Gmail as an example for the tutorial however you can select any service depending on your need. As you see in the screenshot below, it supports a number of email clients.

select archive

Note: If you wish to create archive from services like like Hotmail or Yahoo Mail, you must configure them by settings. A quick Google search would reveal those settings.

Lets see how to using MailStore.

Step 4: Provide your Gmail login credentials to let MailStore access your account.

archive in gmail

Step 5: You now need to filter your backup by selecting the specific folders to backup.

Archive settings

Step 6: Double check every thing and once you are sure, hit the Finish button. The backup will run creating a local archive of emails that were in your inbox. The process will take time depending upon the size of your backup.

archiving

Restoring an Email Backup Using MailStore

Step 1: If you wish to restore your backup, go to MailStore Home start page and this time click on Export E-mail.

Export Email

Step 2: Select the service to which you want to restore your backup. I have chosen E-mail address via SMTP for this tutorial.

export optionss

Step 3: Select the folders you wish to export via SMTP connection.

folder select

Step 4: You must now configure your mailbox SMTP connection. For Gmail the SMTP-SSL Host is smtp.gmail.com .

SMTP config

Step 5: Just when you press the finish button the restoration process will start . The process will take time depending upon the size of the archive.

restoring mail

When the restoration process is finished open your mailbox to which you just restored your backup. You will find all the mails in your inbox sent to you by yourself.

restored mail

Make Small Backups

To make your backup size small, sort your emails in folders online according to priority and at the time of archiving make sure you select only the specific folder as mentioned in the step 5.

an artistic composition of materials and objects pasted over a surface,

According to the dictionary, a collage is “ an artistic composition of materials and objects pasted over a surface, often with unifying lines and color.” So, a photo collage would be a collection of artistically overlapping photos that fit in one frame and look awesome.

There are many tools, both desktop and web based, that let you create photo collages effortlessly. However, Google’s Picasa 3 stands out among them. It has some excellent options when it comes to creating a photo collage. In this article, we’ll see how, with the help of Picasa, you can create and gift wonderful picture mosaics to your loved ones without breaking a sweat

Creating a Photo Collage or a Picture Mosaic With Picasa 3

Step 1: Download and Install the latest version of Picasa from their official home page.

Step 2: On the left hand side bar you will see all your photographs indexed into folders while the right bar will show you the thumbnail of all the photographs in your computer. Select the folder which contains the photographs you wish to create a collage from, and click on Create—>Picture Collage from the menu bar.

Fullscreen capture 7212011 124510 PM

Step 3: Once you are on the collage creation page, select the type of effect you have on mind from settings tab.

collage style

Step 4: You can now touch up your collage by adjusting parameters like Picture Borders, Background Options and Page Format.

collage settings

Step 5: You can tilt and enhance photos in the mosaic right from the angle wheel in the preview window. It’s a pretty neat feature which you won’t find in most of the other such tools. This feature gives you the flexibility to individually work on each photo in the collage and align it with others in the frame to your satisfaction.

Angle and Scale

Step 6: Once you are pleased at heart that the collage in the preview is just what you want it to be, click the Create Collage button.

Step 7: Wait for Picasa to draft your collage. It my take time depending upon the number of photographs used or quality of the photographs.

Draft Image

Step 8: Once your collage is ready, export it and save it at your desired location.

save as

That’s all folks, you now have your first collage saved in the hard disk. You can now email it, print it, decorate it or get it printed out and framed.

Final image

Tuesday, July 12, 2011

Apps are the best part of any smartphone.

Apps are the best part of any smartphone. Widgets, on the other hand, don’t get much love but if you really start using them, you’ll find them more indispensable than apps. Widgets are a godsend – they let you quickly monitor and toggle settings.

Here’s a hand-picked list of some of the best widgets available for your Android phone. Pick and use what you really need. Appbrain links included. (repost)

Mobile Signal Widget

Mobile Signal Android Widget

The Mobile Signal Widget for Android constantly displays the signal strength that you’re getting on your phone in dBm. This is particularly useful if you have a mobile phone with reception issues – you can keep an eye on the signal strength right from the home screen.

Multicon Widget

The Multicon Widget helps you increase the number of icons that are displayed in a specific row/column. For instance, a 2×2 widget can show 4 icons in the same area which cannot usually hold more than 2 icons.

Days Until Widget

The Days Until Widget lets you set a date and see the number of days left till that date. Multiple instances allowed, and you can choose events from your calendar. Colors and size can be customized and weekdays can be excluded.

Audio Guru Widget

The Audio Guru Widget lets you set multiple profiles and adjust volumes quickly from the home screen. You can also auto activate profiles based on the time of the day. Absolute powerhouse.

Data Counter Widget

Don’t install bulky apps to monitor network usage. Try the Data Counter Widget instead. Shows Wifi, 3G or GPRS usage for a particular day, week, month or all time or since last boot. The widget isn’t aesthetic, but does its job perfectly.

Gmail Unread Widget

The Gmail Unread Widget can be used to keep track of your unread emails. It monitors your local Gmail app database for new email. The widget’s icon and its name are customizable. To keep track of unread emails in individual labels, check out the Gmail Label Widget.

Mini Info Widget

Mini Info is a complete system monitor widget. Shows all the data you’ll ever need – memory, RAM, battery and SD card usage. You can make it show only the data you need.

Silent Toggle Widget

You can switch to silent mode by long pressing the power button on your phone but a widget is even more handy. The Silent Toggle Widget lets you quickly toggle between sound only, sound and vibrate, and silent modes in a jiffy.

Battery Watcher Widget

The Battery Watcher Widget shows your phone’s battery level in percentage. The widget also shows the temperature. Simple and up to the point, does what it says.

Android Agenda Widget

Arguably, the best widget on Android for busy people. Android Agenda Widget shows upcoming events and tasks from Google Calendar, Astrid and several other apps. It is extremely customizable with plenty of skins.

Tip: Make sure you add the services run by these widgets to the ‘Ignore’ list in your Task Killer app. These services are necessary for the widgets to function perfectly.

Laptops with detachable Keyboards

Laptops with detachable Keyboards

SkyLift – Boarding System for Aircraft


Notebook lamp

Dual Music Player That Plays Your MP3 Collection & Your CDs

Rubik Cube Mp3 Player

Mobile Projector

Ipod Detachable Speakers

BYB Balance Cell Phone (touchscreen )

A Phone That Really Hangs Up


Cellphone Inspired By Chinese Scrolls

Umbrella Lights

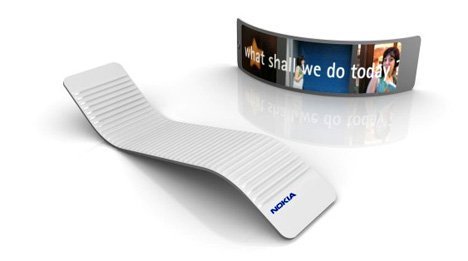
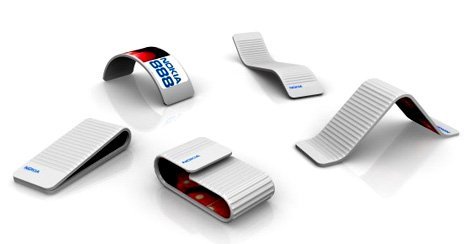
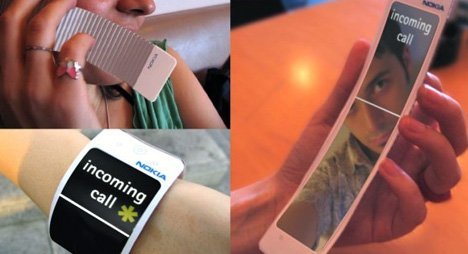
Nokia 888 Mobile Phone

LinkWithin

Related Posts Plugin for WordPress, Blogger...